Step-by-Step: How to DIY Your TV Mounting Like a Pro
Gathering Your Tools and Materials
Before you start the DIY TV mounting process, it's crucial to gather all the necessary tools and materials. Having everything you need at hand will make the job smoother and more efficient. You will need a stud finder, level, drill, drill bits, screwdriver, tape measure, pencil, and the mounting kit that suits your TV and wall type.
Additionally, make sure you have the appropriate screws and anchors for your wall. These can vary depending on whether you're mounting on drywall, plaster, or a concrete wall. Having a variety of screw sizes can be helpful for unexpected adjustments.
Finding the Perfect Spot
Choosing the right spot for your TV is not only about aesthetics but also about comfort and viewing experience. Ideally, the center of the screen should be at eye level when you are seated. Use a tape measure to determine the best height for your TV. Consider factors like room layout, sunlight, and viewing angle to ensure the best placement.
Once you've chosen the perfect spot, use a stud finder to locate the studs in your wall. Mark these locations with a pencil as they will be crucial for securely mounting your TV bracket.
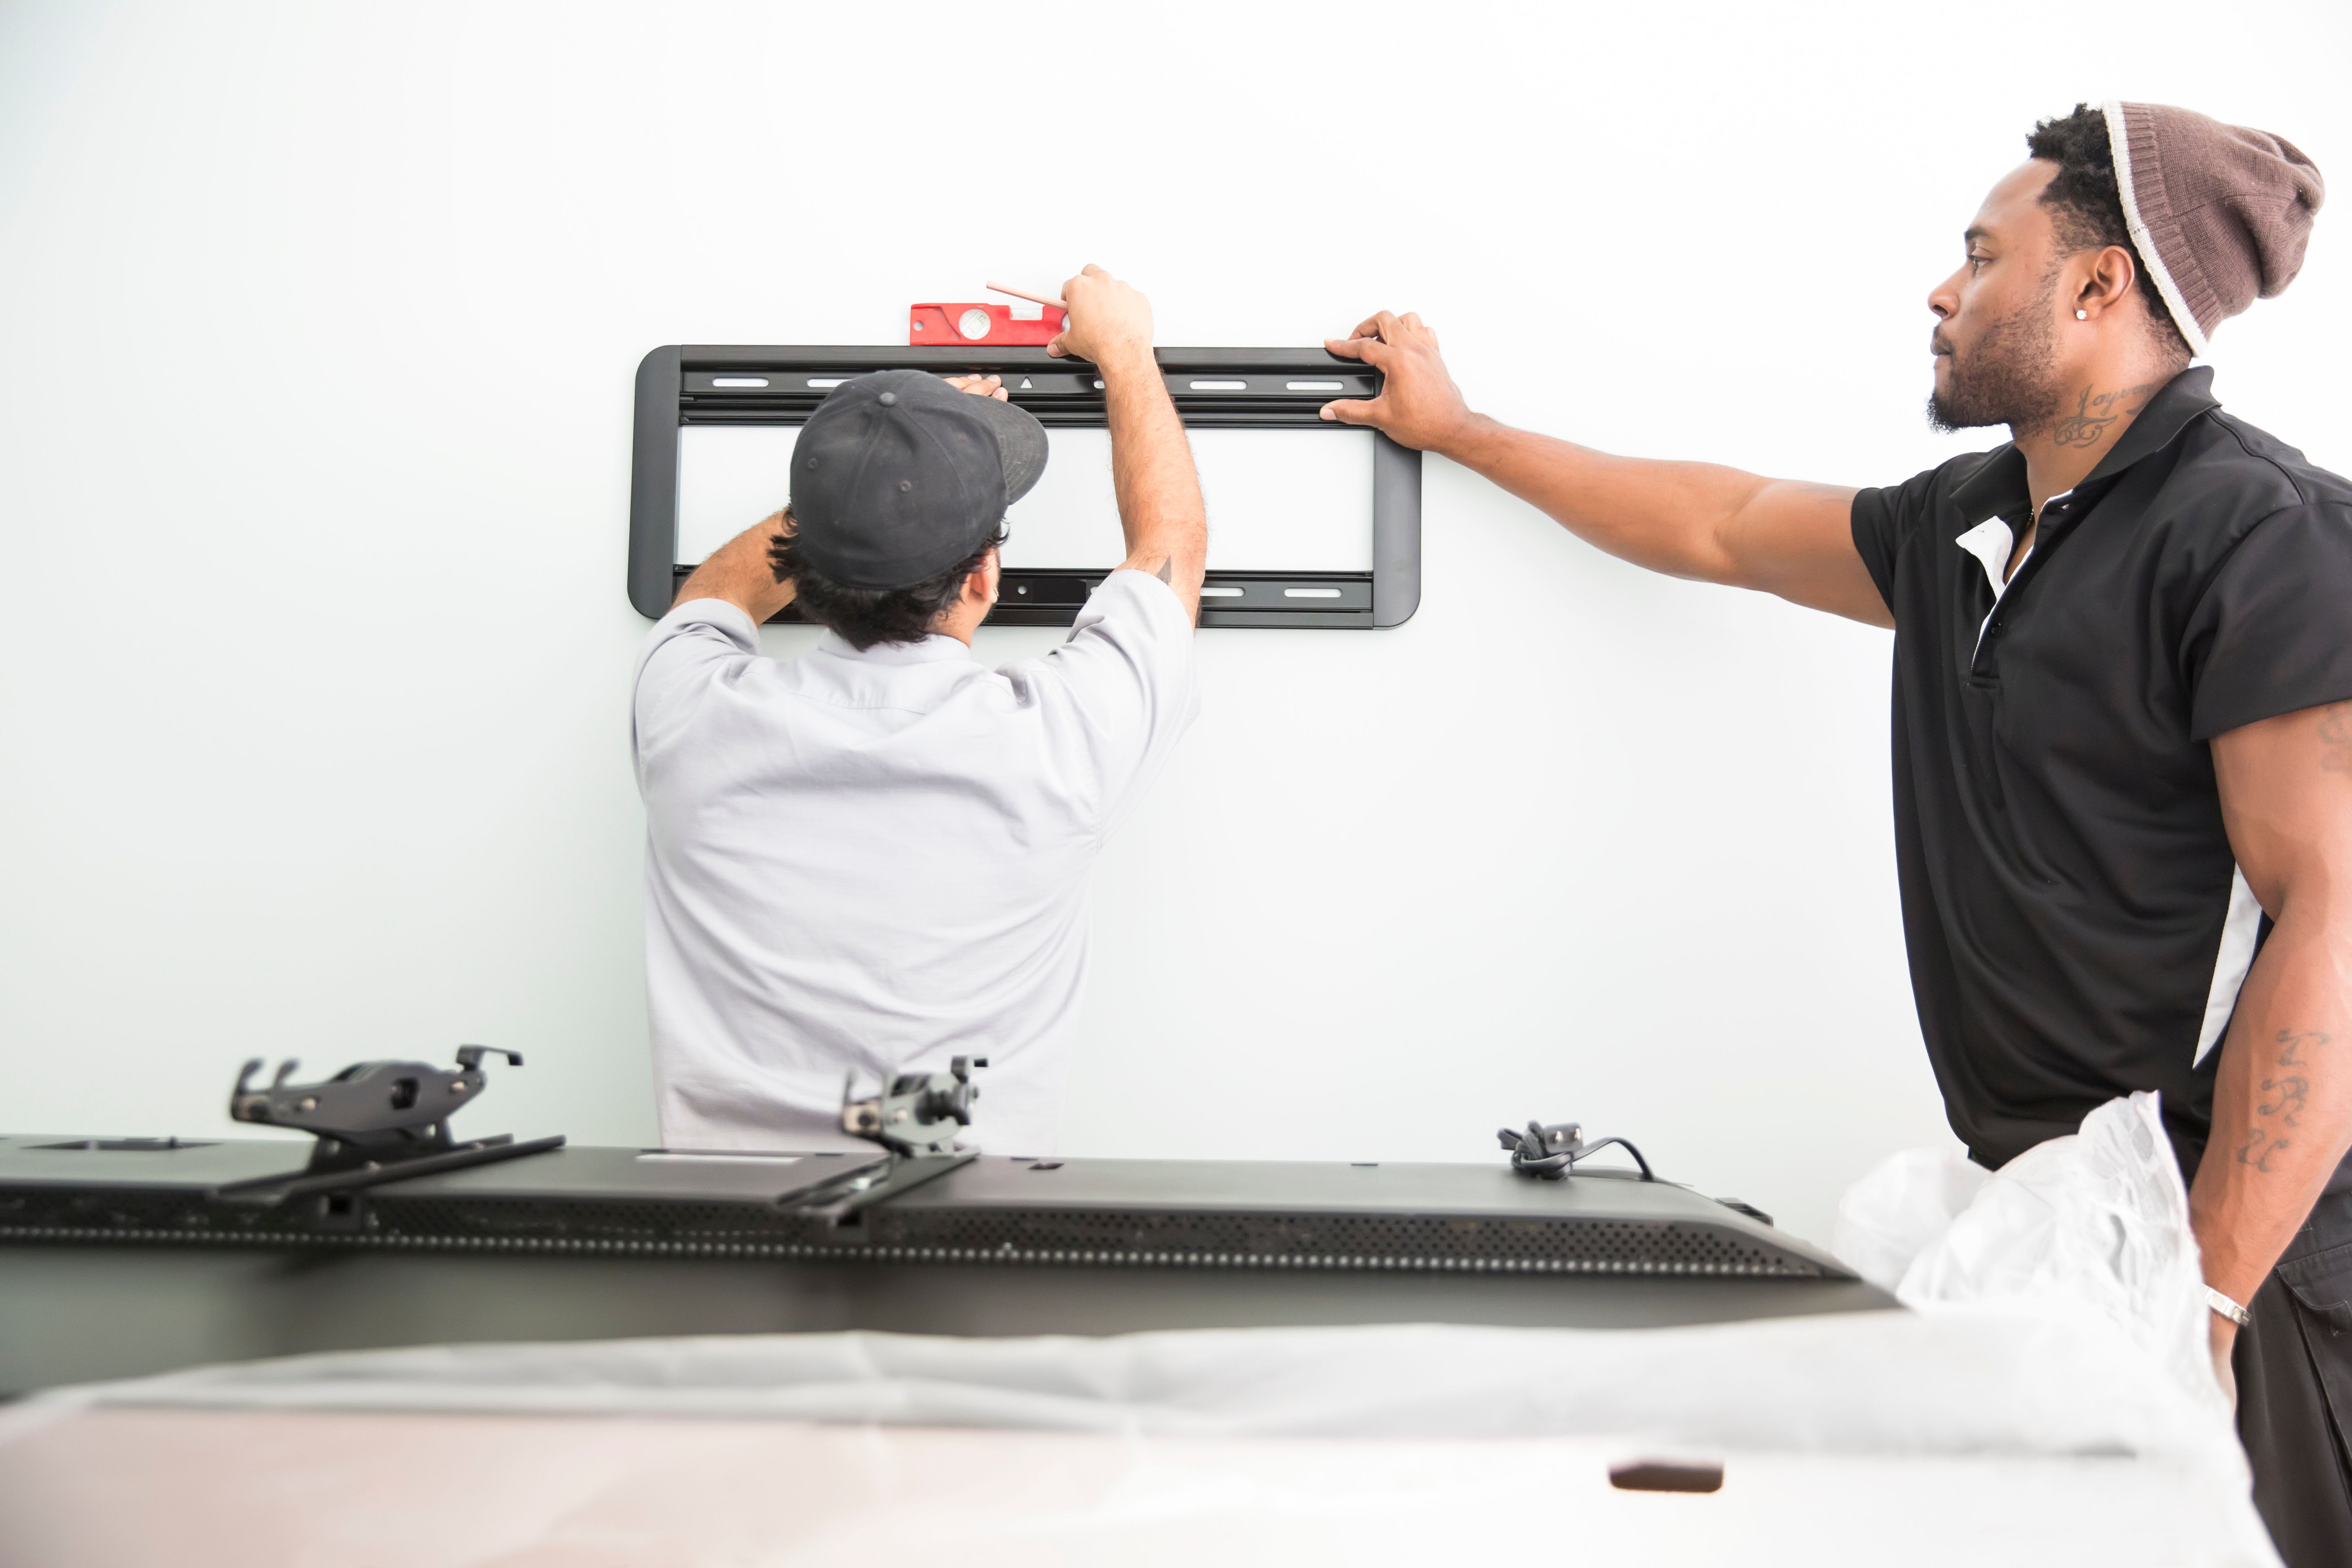
Installing the Mounting Bracket
With your spot selected and studs marked, it's time to attach the mounting bracket to the wall. Hold the bracket against the wall and use a level to ensure it is perfectly horizontal. Mark the screw holes with a pencil, double-checking that they align with your studs.
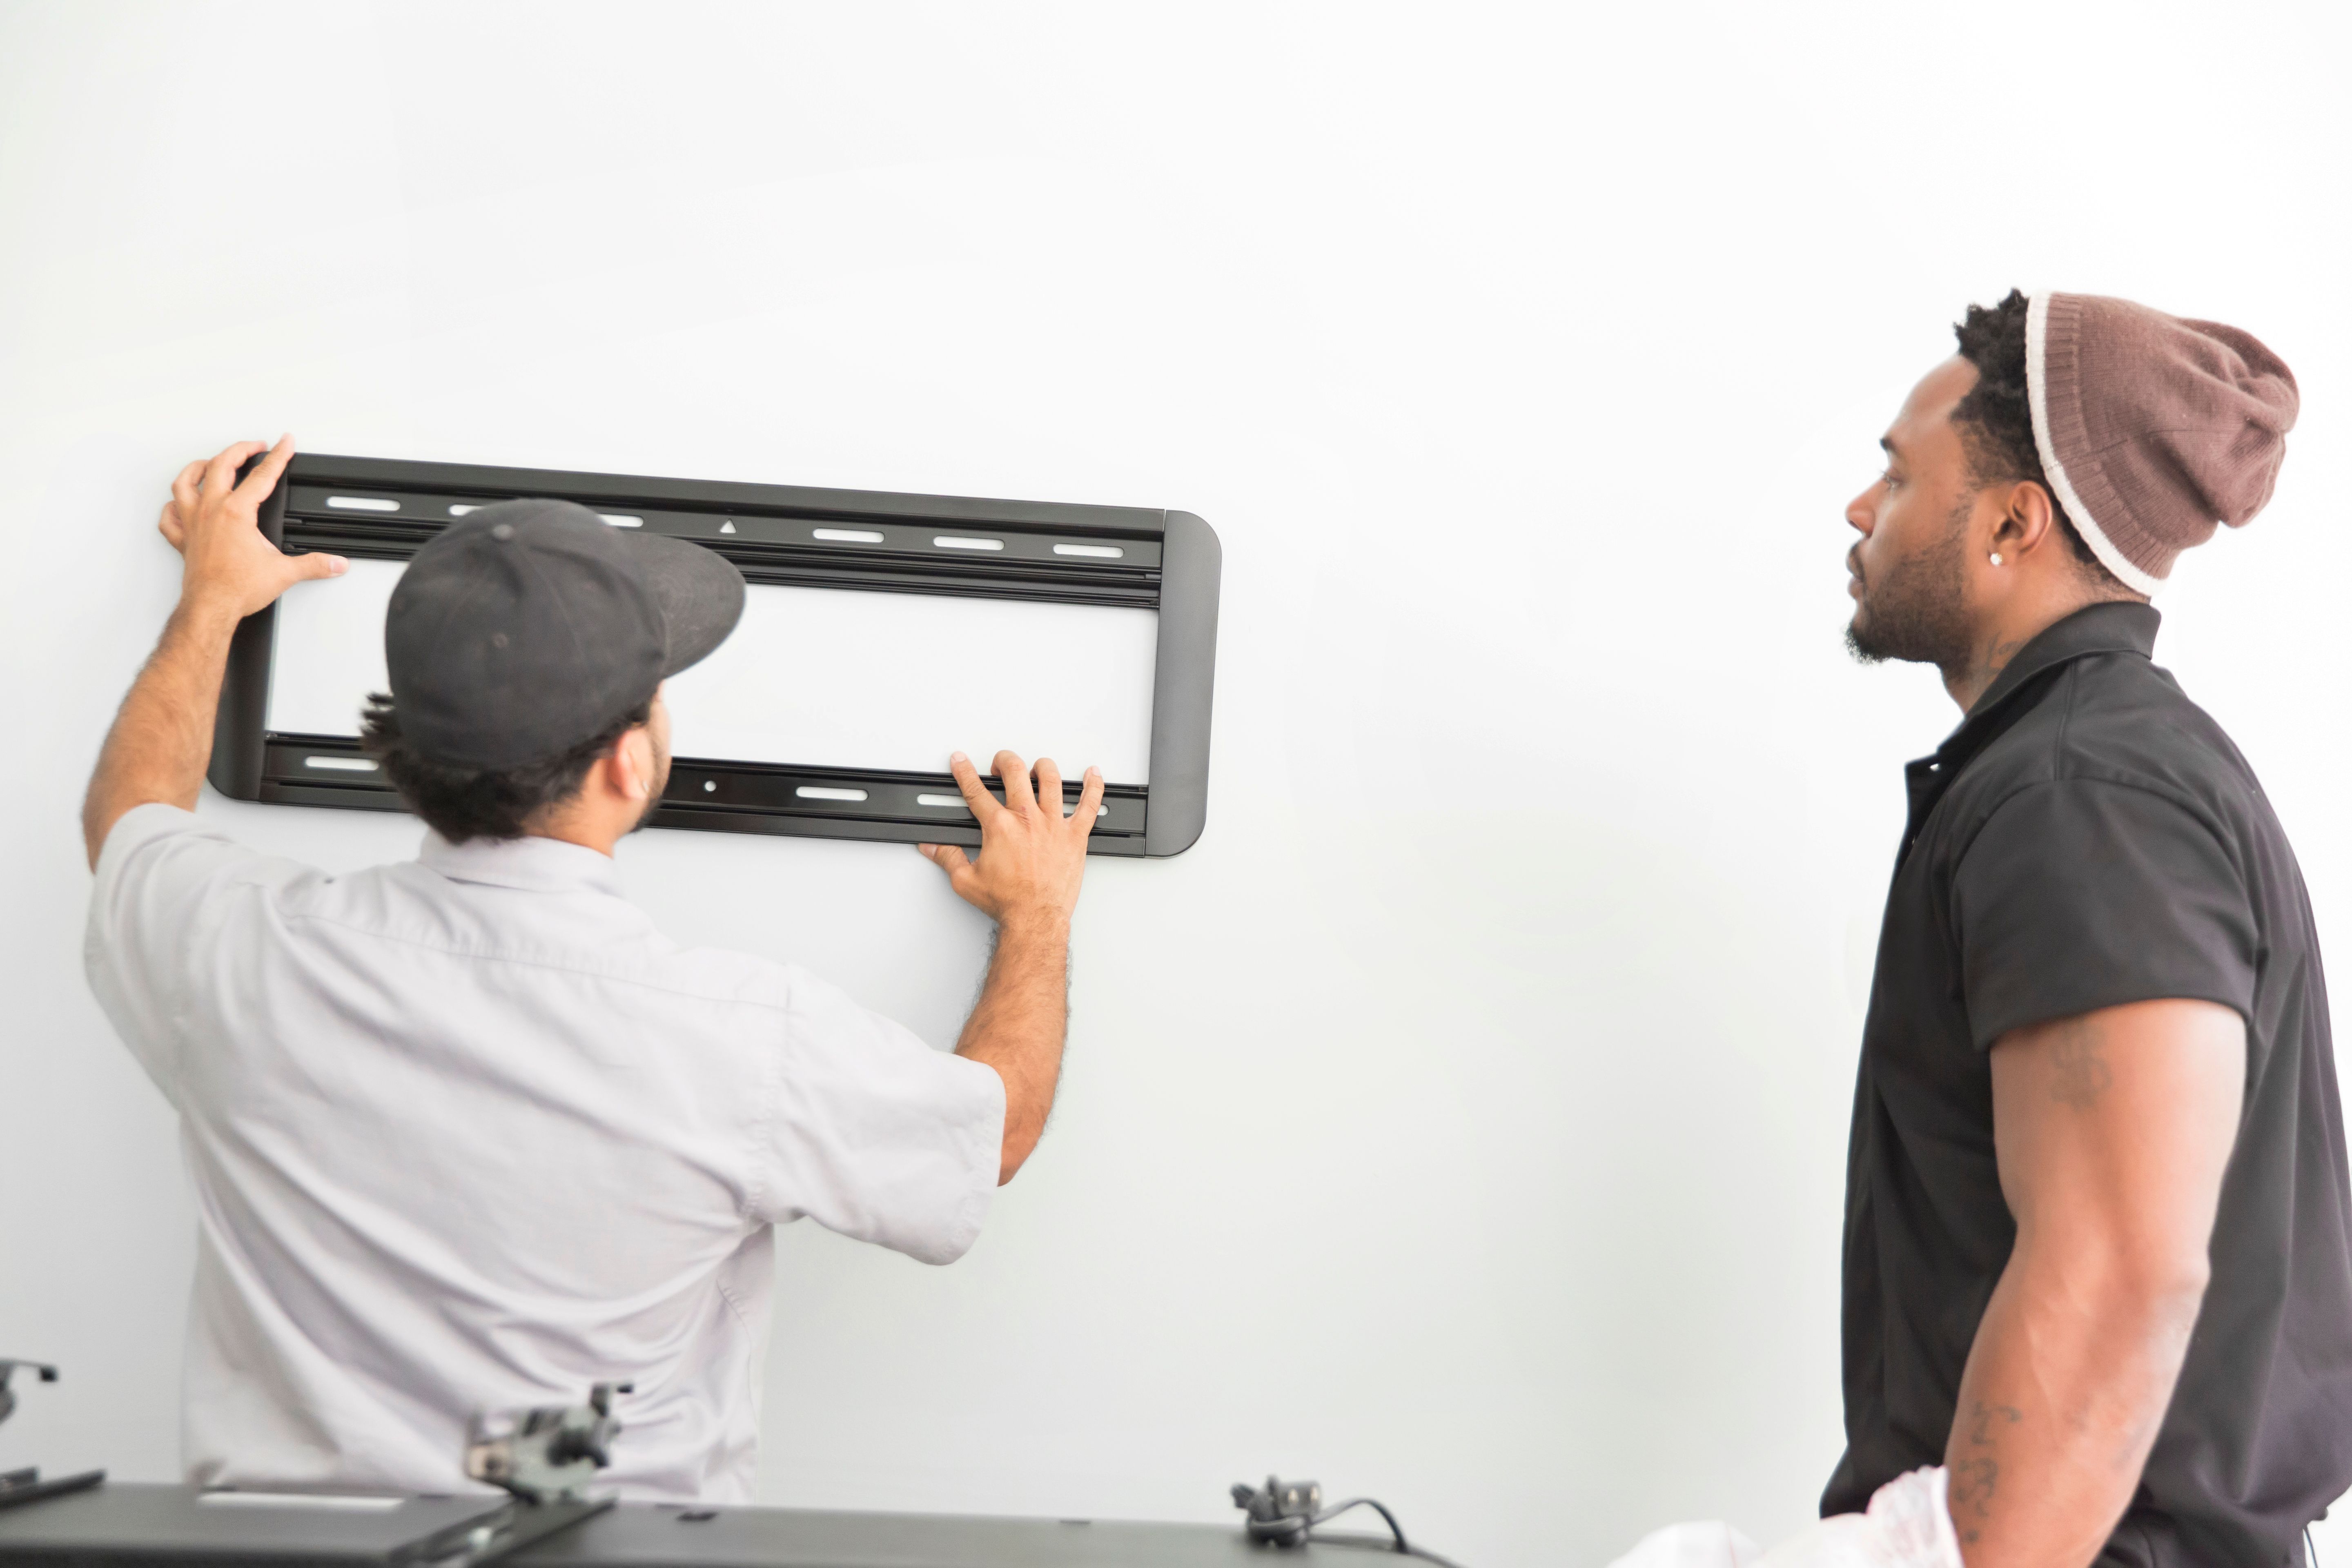
Drill pilot holes into the marked spots on the studs. Then, secure the bracket to the wall using screws and a screwdriver. Ensure that the bracket is tightly secured and does not wobble.
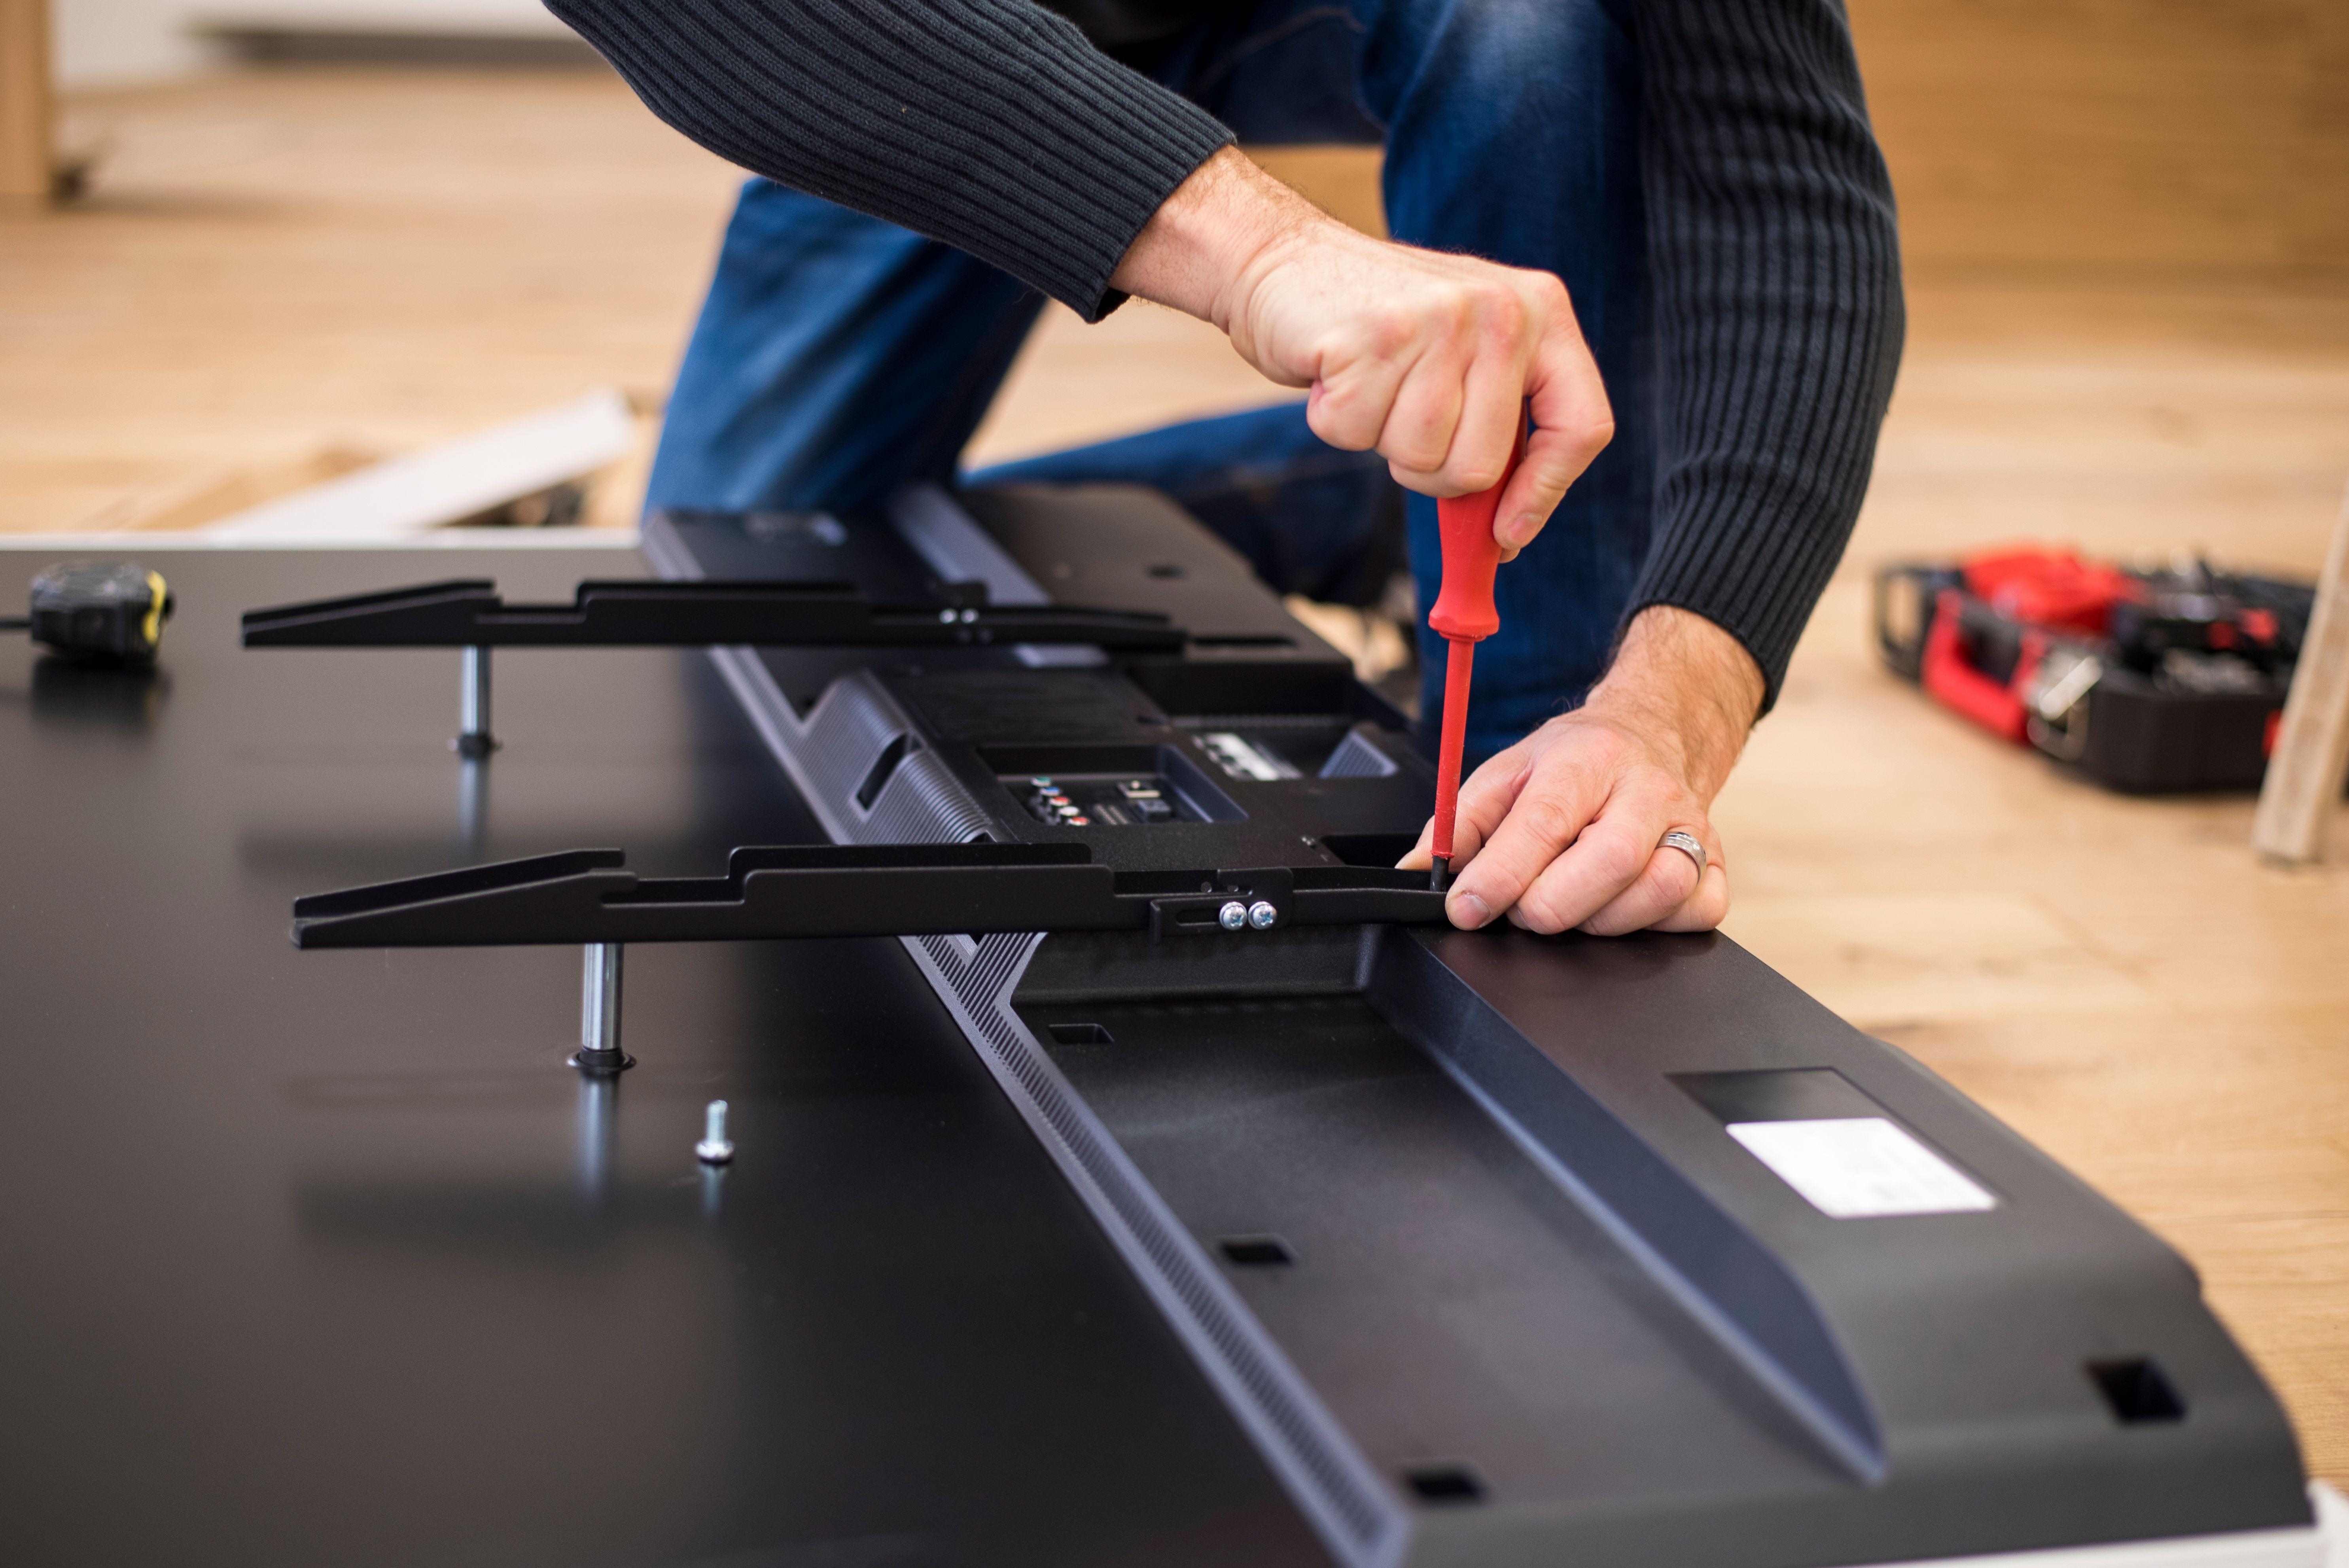
Attaching the TV to the Bracket
Before lifting your TV, you should attach any necessary components from your mounting kit to the back of your TV. This usually includes mounting arms or rails that will hook onto the bracket on the wall.
With another person's help, carefully lift the TV and attach it to the wall bracket. Make sure it clicks into place securely. Double-check all connections to ensure that the TV is safely mounted.
Final Adjustments and Cable Management
Once your TV is mounted, make any final adjustments needed to ensure it is level and secure. Some mounts offer tilt or swivel adjustments; ensure these are set to your preference for optimal viewing.
Cable management is an essential finishing touch for a professional-looking setup. Use cable ties or a cable management cover to neatly organize and hide wires. This not only improves aesthetics but also prevents potential accidents from tripping over loose cables.
Testing Your Setup
After mounting and securing everything, it's time to test your setup. Turn on your TV and check for any issues with picture quality or angle. Ensure that all cables are connected correctly and that there is no interference with signal reception.
If everything looks good, sit back and enjoy your favorite show or movie with pride in your DIY accomplishment!